It may take time to apply oils, moisturize the hair and brush it to form the 360 degrees wave pattern. Learning how to tie a wave cap can help reduce moisture loss and maintain this wave pattern for longer, preventing the hassle of making the hair now and then.
Contents
How to Tie a Wave Cap
The pattern of the wave hairstyle is prone to distortions as you sleep or moisture loss during sunny days. Fortunately, a wave cap, also known as a stocking cap, can help to hold these waves in place, maintaining the hairstyle for longer.

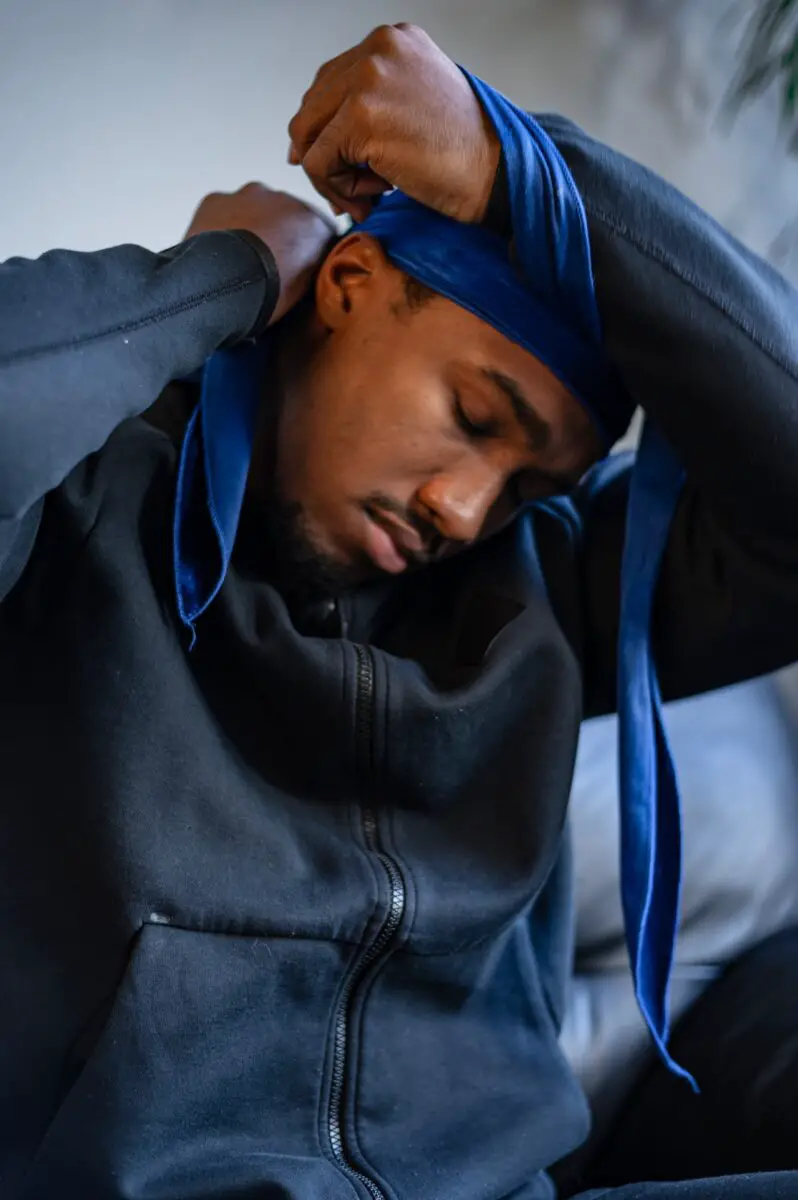
The wave cap works like a durag, only that a durag is a scarf that you tie around the head, while a wave cap is more like the traditional caps made of women’s stockings. Like durags, these caps help to press the hair against your head, preventing distortions of the pattern at night or when running errands.
These caps are designed with fabric that covers your head area and an elastic band that helps to hold them in place around the head. This simplistic design makes wave caps easier to wear and more comfortable to wear, and you can tie them using the following steps.
Brush Your Waves
Before you wear the cap, you might want to ensure the hair is in a good ripple-like pattern. This reduces the chances of the hair curling up or straightening out of style when you wear the cap. For instance, some waves might distort when running errands, and wearing the cap without putting them back into shape will cause further distortion and loss of style.
With the hair clean and dry, apply around a quarter of Pomade. Take a towel, soak it in hot water, wring it out and then wrap it around your head. You can leave the towel on your head for around two minutes to allow Pomade to get into your hair.
Take a brush with hair-synthetic bristles and then brush for around 5 minutes, starting from the crown towards the forehead. Start around an inch from the crown of your head and brush towards the sides of the head. Finally, start from the crown of your head and brush towards the nape of the neck.
Pull Out the Elastic Band
With your hair moisturized and forming a good 360 degrees wave hairstyle, you can proceed to tie the cap. It’s advisable to use a three-way mirror to prevent accidental distortion of the waves. This cap is usually made with an elastic band that helps to hold it in place.
In most cases, this band is made of spandex, and you can stretch it without breaking it. Put the palm of your hands together and insert them in the cap such that the seam of the cap aligns with the opposite side of the thumbs.
Put your hands apart, stretching the elastic band with the back of your palms. Since spandex doesn’t break easily, you can try to stretch the band wide enough such that it won’t touch your waves as you put the cap on your head.
Start With the Back of the Head
One of the common mistakes you can make is to wear the cap starting with the crown of the head. In most cases, this makes the elastic band pull back around the crown area of your head, pulling back your waves and distorting their shape.
Instead, consider starting with the back of your head. With the elastic band wide stretched, place your palms on the side of your head around the back area, and insert the cap from the back. You can also try using your hands’ palms to smoothen the waves as you insert the cap.
Use the mirror to ensure the seam of the cap runs from the forehead area toward the nape of your neck. Centering the seam ensures the cap is balanced on both sides. This prevents the elastic band from pulling towards one side, which might distort the waves or make the cap come off.
Pull the Cap Forward and Down
The chances of distorting the shape and alignment of the waves increases as you try to make adjustments to the cap. To prevent this, when fitting the rear of your head, try to pull the cap forward and down as much as possible during the first move.
This reduces the number of times you try to put your fingers back in the elastic band to make adjustments. However, the extent the cap will fit during this first move primarily depends on the size of the cap, the shape of your head, and the size of the hair.
Once your hands have slipped out of the elastic band, don’t put them back in, as they might push the waves backward and distort their shape. Instead, slip your thump in the band, use your first and second fingers to hold the outside of the band, and then pull the cap forward and down until it fits.
Fold the Elastic Band to Create a Small Pocket
Wave caps are generally made of delicate materials such as polyester and nylon. In most cases, the fabric also has a small percentage of spandex to make it elastic and fitting. However, the elastic band is usually made of a heavier fabric and higher amounts of spandex, so it can hold the cap in place.
As a result, the band exerts more pressure on the waves than the rest of the cap. In most cases, this distorts the shape of your waves and causes a line around your head where the band passes. This line can be more noticeable if the band is tight.
To prevent this line, it’s advisable to fold the band to create a small pocket. This means you will need to pull the cap down until the fabric covers the end of your waves with the band going down to around the forehead and ear area and then folding it back to align with the ending of the fabric.
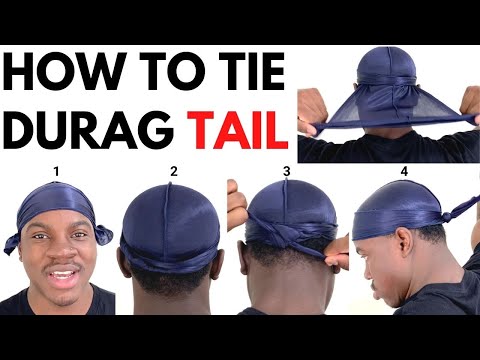
Steps to Tie a Wave Cap
| Steps | What to do |
|---|---|
| Step 1 | Brush your waves |
| Step 2 | Pull out the elastic band |
| Step 3 | Tie the back of the head |
| Step 4 | Pull the cap forward and down |
| Step 5 | Fold and the elastic band |
Benefits of Tying a Wave Cap the Right Way
Although tying a cap the right way might seem tedious, it keeps your hairstyle in shape, and you might not need to brush your waves every time you remove the cap. The fabric and design of the cap also offer you the following benefits.

- Seals the hair moisture: Usually, you will spend some time applying oils to your waves to keep them moist and in good texture and shape. The cap prevents this oils from drying or smearing on your pillow as you sleep, preserving the moisture
- Protects the hair from UV light: Direct sunlight and UV rays can damage curly hair. The cap helps to protect your hair from direct sunlight, especially during summer
- Keeps the hairstyle intact: Since the cap is made of stretchy fabric, it helps to hold your hair in place, reducing the chances of waves distortions and loss of shape
Frequently Asked Questions
Can a Wave Cap Come Off at Night?
Yes, the cap can come off at night, especially if the band is not tight enough. It can also come off if the fabric is too loose in such a way you can place your hand on a section of the fabric as you turn, accidentally taking the cap off.
How Long Should I Stay With a Wave Cap?
It’s advisable to wear a wave cap when going to bed or 30 minutes after brushing. Note that the tightness of the cap can affect its overall comfortability and how long you can wear it.
For instance, wearing tight caps for long can cause hair dryness, lines, irritations, and discomfort.
Is It Better to Sleep With a Durag or a Wave Cap?
Durag is better to sleep with compared to the wave cap. Durag offers more compression, which prevents it from turning and coming off the head when you are sleeping.
However, the durag might result in irritation due to the tight compression, which prevents the hair follicles from getting enough oxygen, making you uncomfortable.
Final Thoughts
Learning how to tie a wave cap will help to keep your wave hairstyle in a good ripple-like pattern for longer. Brush the hair before wearing the cap, stretch the band of the cap, and then put it on from the back. Then pull it forward and down.